Saturday, October 31, 2015
Friday, October 30, 2015
The Importance of Good Lighting
Lighting is an underrated and often ignored element of design, at least for amateur designers. Good lighting schemes set off unique elements of a living space and improve the overall feel of a living area. I've tried to add some unique lighting elements that will highlight the best aspects of the cabin. Here are some of the things I've tried to do.
The open log rafters are, perhaps, the best visual element of this rustic log cabin. To highlight that element, I will place a light in each framed space between the log rafters where they rest on the log wall. The lights will point up into the space between the log rafters to illuminate both the rafters and the TnG wood ceiling. This area is the open vault ceiling in the main downstairs living space, so it will be very visible.
The two upstairs bedrooms surround the open upstairs sitting area. Rather than run the walls separating the sitting area and bedrooms all the way to the ceiling, I cut them short and framed horizontally back into the rafters and TnG ceiling, to create a small shelf. I had the electrician wire an outlet on the wall up high so I can run a rope light along this small shelf and create an indirect lighting effect that should provide a subtle glow to this upstairs area. The outlet is connected to a switch, so I will be able to turn the rope light on and off from the second floor level.
The electrician also wired an outlet up high on the wall near the ridge log. I plan to run another rope light along the top of the entire length of the ridge log. This will allow me to indirectly light up the upper reaches of the cabin. This is also connected to a switch for convenience.
The Upstairs Challenge
Arranging the upstairs has been, to say the least, a challenge. I reduced my wall heights from 12 logs to 8, for various reasons. One reason was the sheer size of what the cabin would be, had I gone to a full 12 log wall. Ten logs high would have been ideal, but I digress. The reduced wall height has affected my upstairs configuration. So, using some resourcefulness, I've tried to make lemonade out of lemons. Here are some examples.
Front Steps
The steps up to the front deck need to match the overall look of the cabin. I think rough cut 4 x 12 lumber works for that.
A New Back Porch Would Be Nice
We're getting there. I have largely ignored the back side of the cabin, until now. The back porch will run the entire length of the back side of the cabin, and will provide a nice place to welcome the Sun in the morning during breakfast or a shaded spot for dinner in the evening. I still have some work to do, but it's coming along.
Saturday, August 22, 2015
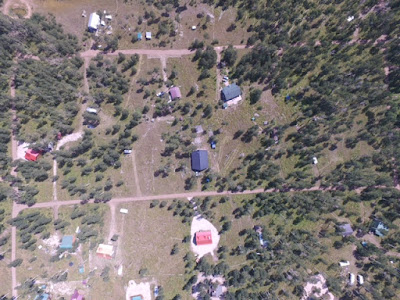
Bird's Eye View
My buddy came up to the cabin this weekend to help and brought his drone. Here are some pics he took from up in the air. Great perspective.
From 200 feet
From 400 feet
From 600 feet
From 800 feet
From 1000 feet
From 200 feet
From 400 feet
From 600 feet
From 800 feet
From 1000 feet
Friday, August 14, 2015
Unique Experience
It's not every day you catch a hummingbird. This is the second one I've caught inside my cabin. But it's the only one of which I have any photographic evidence.
Stairs (continued)
Stairs are pretty challenging if you have never done it before. It's taken me a while to figure these out, but I think I've finally gotten it. The trick was to turn it 90 degrees, butt it up against the main beam, and then tie into the floor at the correct spot.
Subscribe to:
Comments (Atom)


